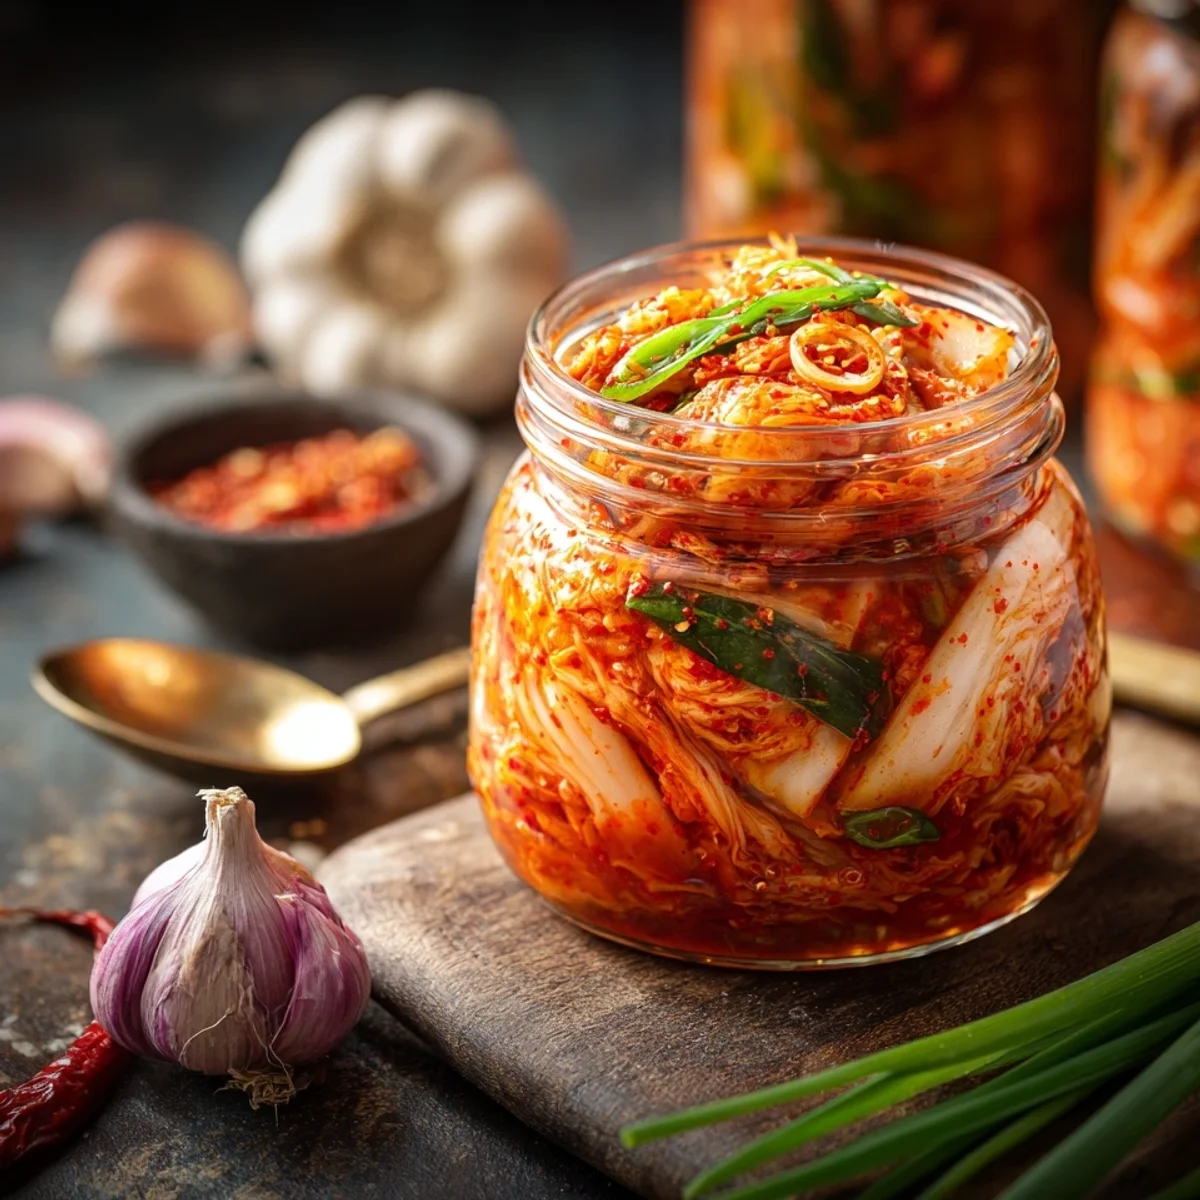


Oh, hey there, friend! Let me tell you, my first taste of Korean Cabbage Kimchi was a revelation. It was at a tiny, unassuming Korean restaurant, and that vibrant, spicy, fermented crunch just… hooked me. I knew then and there I HAD to learn how to make it myself. Years of trial, error, and a few chili-flake-induced coughs later, I've got this recipe down. It's truly a labor of love!
One time, I was so excited to get to the mixing part that I forgot my gloves. BIG mistake! My hands were burning for hours, even after multiple washes. It was a painful, fiery reminder to ALWAYS protect your skin when handling that much gochugaru. Oops! My family still laughs about my 'chili hands' incident.
Ingredients for Your Best Korean Cabbage Kimchi
- 5 lbs Napa cabbage, outer leaves removed, quartered lengthwise, and cut into 2-inch pieces: Napa cabbage is the star of our show, right? Its broad, tender leaves are perfect for soaking up all those amazing flavors. I’ve tried other cabbages, but honestly, nothing gives you that quintessential crisp-yet-tender texture for Korean Cabbage Kimchi. Make sure to cut it just right, too big and it's hard to eat, too small and it gets mushy. This is the foundation, so treat it with love!
- 1/2 cup Kosher salt (for brining): This isn't just any salt, it's the magic dust that transforms our cabbage. Brining is key it draws out excess water, making the cabbage super crunchy and ready to absorb the paste. I've learned the hard way that skimping on this step makes for limp, sad kimchi. You want that satisfying 'snap' when you bite into your Korean Cabbage Kimchi, and good kosher salt helps get you there.
- 1 cup Gochugaru (Korean chili flakes): Ah, gochugaru! The soul of kimchi. This isn't just about heat, it brings a beautiful sweetness and a vibrant red color. Don't substitute with regular chili powder, it just won't be the same. I once used a different chili powder, and the color was off, and the flavor was just… flat. Gochugaru is essential for that authentic flavor profile of Korean Cabbage Kimchi.
- 1/2 cup garlic cloves, peeled: Garlic, glorious garlic! We're talking a generous amount here, and for good reason. It provides that pungent, aromatic depth that balances the spice and fermentation. Fresh is non-negotiable, hon. Pre-minced just doesn't cut it. You want that fresh, potent kick, not some sad, muted garlic flavor. Trust me, your taste buds will thank you for using fresh cloves.
- 1/4 cup fish sauce: Okay, this might sound a little funky if you're new to it, but fish sauce is pure umami gold. It adds a savory, complex depth that you just can't get otherwise. Think of it as a secret weapon that elevates all the other flavors. Don't worry, the 'fishy' smell mellows out completely during fermentation, leaving behind only deliciousness. It's a game-changer!
- 2 tbsp salted shrimp (saeujeot), finely minced: Saeujeot, or salted shrimp, is another umami bomb, similar to fish sauce but with its own unique funk and depth. It's a secret ingredient that gives your kimchi that authentic, rich flavor profile. If you can find it, use it! I’ve skipped it before, and while the kimchi was still good, it lacked that extra layer of complexity. It's worth seeking out for the real deal.
Mastering the Art of Korean Cabbage Kimchi: A Step-by-Step Guide
- Step 1: Brine the Cabbage:
- First up, we're going to get that cabbage ready for its transformation! Take your cut Napa cabbage and give it a good rinse, then toss it in a HUGE bowl with the Kosher salt. Really get in there with your hands, massaging the salt into every piece. It's messy but fun! Let it sit for about 2-3 hours, tossing every 30 minutes. You'll see it wilt and release water that's exactly what we want for crunchy Korean Cabbage Kimchi. Don't rush this step, it's foundational!
- Step 2: Cook Rice Porridge:
- While your cabbage is brining, let's get our porridge going. Whisk together the glutinous rice flour and 1 cup of water in a small saucepan. Cook it over medium heat, stirring constantly until it thickens into a glossy, translucent paste, kind of like a thin gravy. This rice porridge is so important, it helps bind the Korean Cabbage Kimchi paste and also feeds the good bacteria for fermentation. Let it cool completely before you use it, super important!
- Step 3: Make Kimchi Paste:
- Time for the magic! In a food processor, combine your garlic, ginger, fish sauce, salted shrimp, and granulated sugar. Give it a good blitz until it's a smooth, fragrant paste. Then, transfer that to a large mixing bowl and stir in your cooled rice porridge and the beautiful gochugaru. Mix it all together until you have a thick, vibrant red paste. This is the heart of your Korean Cabbage Kimchi, packed with flavor!
- Step 4: Combine Fresh Aromatics:
- We're almost there, friends! Into your glorious kimchi paste, you'll want to add any other fresh aromatics you like think sliced daikon radish, carrots, or green onions. I personally love the crunch and extra layer of flavor they add. Fold them in gently, ensuring they're well coated in that fiery red mixture. This adds even more texture and complexity to our amazing Korean Cabbage Kimchi.
- Step 5: Rinse and Drain Cabbage:
- Okay, your cabbage should be nice and pliable now. Give it a really thorough rinse under cold running water, probably 2-3 times, to wash off all that excess salt. This is SO important, or your Korean Cabbage Kimchi will be way too salty! Then, squeeze out as much water as you can with your hands. You want it damp, not soaking wet. Let it drain in a colander for at least 30 minutes, or even an hour, to get rid of every last drop.
- Step 6: Mix Kimchi Ingredients:
- This is where the fun really begins! Put on some gloves seriously, don't skip this like I once did! Add your well-drained cabbage to the bowl with your kimchi paste and fresh aromatics. Now, get your hands in there and mix everything together. Really massage that paste into every single piece of cabbage. You want every leaf coated in that beautiful, spicy goodness. It's messy, it's vibrant, and it's the final step before packing your homemade Korean Cabbage Kimchi!
There's something incredibly therapeutic about making kimchi. The vibrant colors, the spicy aroma filling your kitchen, the rhythmic mixing it's a whole experience! It feels like connecting with a culinary tradition, and honestly, the satisfaction of seeing those jars of homemade goodness fermenting on the counter? Priceless. It’s a labor of love, but so, so rewarding.
Keeping Your Korean Cabbage Kimchi Fresh and Flavorful
Once your Korean Cabbage Kimchi is mixed and packed, you'll want to let it ferment on your counter for 1-3 days, depending on how warm your kitchen is and how sour you like it. I usually go for 2 days. Keep it in an airtight container, but 'burp' it daily by opening the lid to release gases. I learned this the hard way when a jar exploded in my fridge oops! After that initial fermentation, transfer it to the fridge. It'll continue to ferment slowly there for weeks, even months! Just make sure to always use clean utensils to avoid contamination. No double-dipping!

Playing Around with Your Korean Cabbage Kimchi Ingredients
Okay, so I've experimented a bit with substitutions for this Korean Cabbage Kimchi. If you can't find salted shrimp (saeujeot), you can bump up the fish sauce a little, maybe an extra tablespoon or two. It won't be quite the same depth, but it'll still be delicious. For the gochugaru, please try to find it, other chili powders just don't have that specific flavor and color. If you're sensitive to fish sauce, I've seen some vegan versions use a blend of soy sauce and mushroom powder for umami, but I haven't personally tried that for this recipe. Keep in mind, swapping out key ingredients will alter the authentic taste, but sometimes you gotta work with what you have!
How to Serve Your Delicious Korean Cabbage Kimchi
Oh my goodness, where do I even start with serving Korean Cabbage Kimchi? It's literally good with EVERYTHING. Of course, it's amazing alongside grilled meats like bulgogi or galbi. But don't stop there! I love tossing it into fried rice for a spicy kick, adding it to ramen or instant noodles, or even topping a hot dog (don't knock it 'til you try it!). It's fantastic in a grilled cheese sandwich, or simply as a side dish to any meal. Honestly, sometimes I just grab a fork and eat it straight from the jar. No judgment here!
The Heart and Soul of Korean Cabbage Kimchi
Korean Cabbage Kimchi is so much more than just a side dish, it's a culinary icon, deeply woven into the fabric of Korean culture. It's been around for centuries, evolving from simple salted vegetables to the complex, flavorful fermented dish we know today. Every family, every region, seems to have its own special recipe, passed down through generations. Making it myself, I feel this incredible connection to that history and tradition. It's a symbol of community, sustenance, and the incredible ingenuity of Korean cuisine. The heart of every Korean Cabbage Kimchi batch is this legacy, and it's a beautiful thing to be a part of.
And there you have it, my friends! Your very own homemade Korean Cabbage Kimchi. It might seem like a project, but the reward is so worth it. The flavors, the health benefits, the sheer joy of making something so incredible from scratch… it’s just the best. I hope you give this a try and fall in love with the process, just like I did. Let me know how yours turns out in the comments below!

Your Burning Questions About Korean Cabbage Kimchi, Answered!
- → How long does Korean Cabbage Kimchi last?
Once fermented and refrigerated, your Korean Cabbage Kimchi can last for several months! The flavor will evolve, becoming more sour and complex over time. Just make sure it’s always submerged in its liquid and use clean utensils to scoop it out.
- → What if my kimchi isn't fermenting?
A few things could be happening! It might be too cold in your kitchen, slowing things down. Or, perhaps you didn't add enough of the rice porridge, which helps kickstart fermentation. Give it a little more time, or move it to a slightly warmer spot.
- → Can I make this spicier (or milder)?
Absolutely! For spicier, just add a bit more gochugaru to the paste. For milder, you can reduce the gochugaru. I'd recommend starting with the recipe amount and adjusting next time to find your perfect heat level. It’s all about personal preference!
- → Why do I need glutinous rice flour?
The glutinous rice flour porridge acts as a binder for the kimchi paste, giving it a lovely texture. More importantly, it provides carbohydrates that feed the beneficial bacteria, jumpstarting the fermentation process. It’s a key player for that authentic flavor and texture.
- → My kimchi smells really strong, is that normal?
Yes, totally normal! Fermentation produces some pretty pungent aromas, especially when it's actively bubbling on the counter. It's a good sign! Once it's in the fridge, the smell will mellow out a bit. Don't worry, it's all part of the delicious magic.