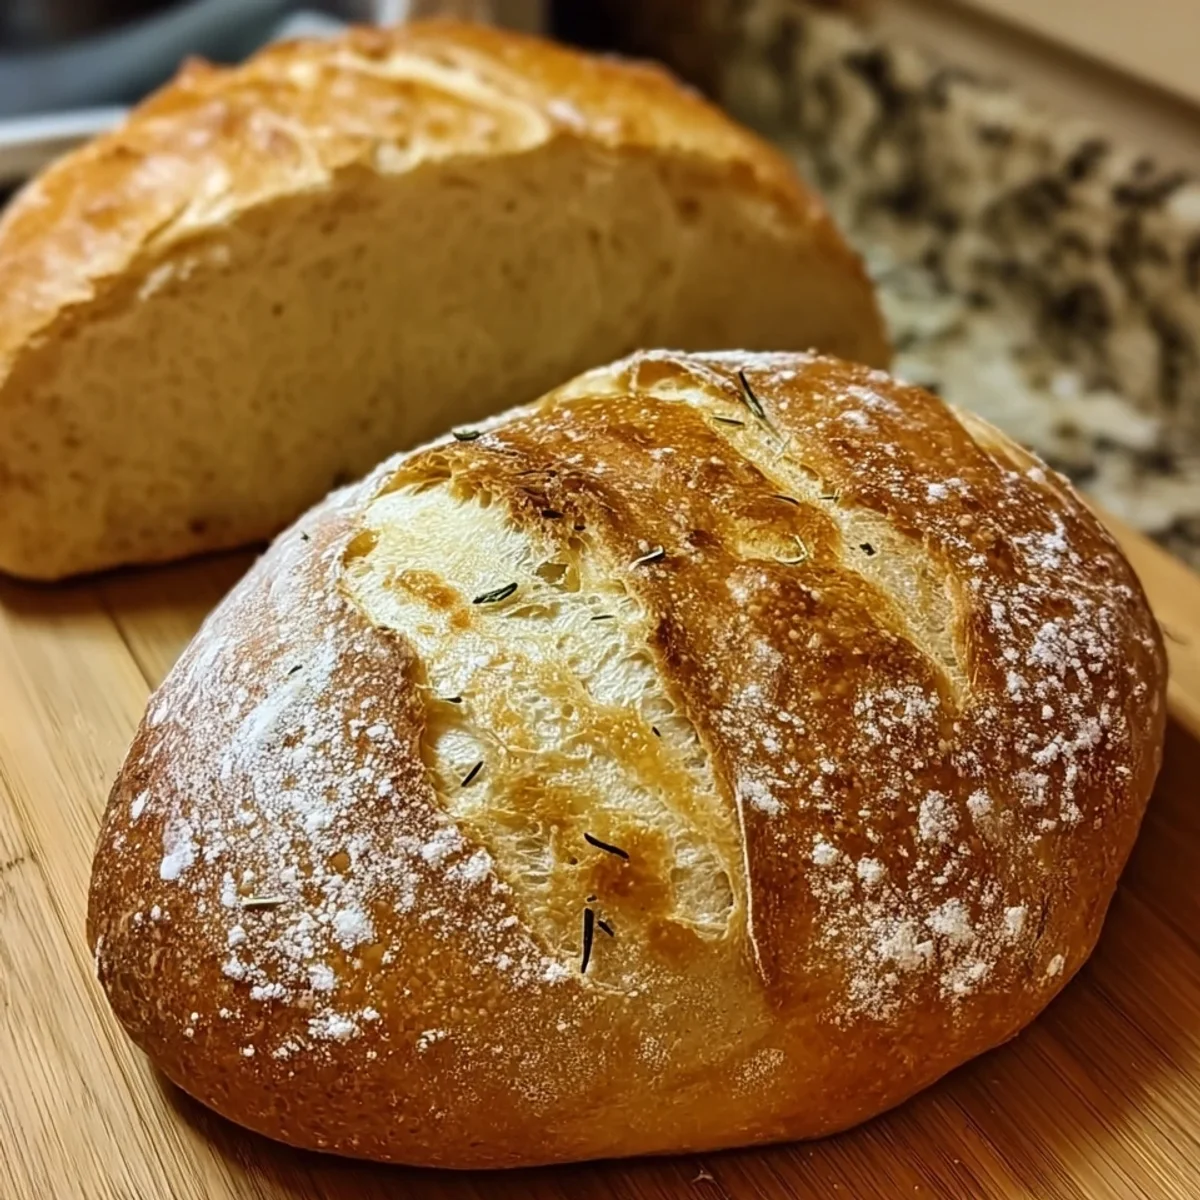


Oh, hey there, friend! Pull up a chair, because I'm about to spill the beans on a recipe that changed my home baking game forever. I remember the first time I pulled a loaf of this Crusty Italian Bread from my oven the aroma, the golden-brown crust, the sheer joy! It was a revelation. Before this, I thought "bakery quality" was a myth for home cooks, but this recipe proved me so, so wrong. Get ready to fall in love with baking bread!
One time, I was so excited to bake this Crusty Italian Bread that I accidentally used cold water for the yeast. Oops! My dough just sat there, looking very sad and not rising one bit. I didn't expect that! I ended up having to start all over, but hey, it was a good reminder that yeast needs its cozy warm bath. Live and learn, right? Now I always double-check that water temp!
Crusty Italian Bread: The Essential Ingredients
- 3 1/2 cups unbleached bread flour: This is the backbone of our Crusty Italian Bread, my friend. Bread flour has a higher protein content than all-purpose, and that's crucial for developing the strong gluten network we need. It gives our loaf that amazing chewiness and structure, letting it rise beautifully. Don't skimp here, it makes all the difference in achieving that signature texture, you know?
- 1/2 cup durum semolina flour: Ah, semolina! This is where some of the magic happens for that golden hue and subtle, nutty flavor. It also adds a lovely, slightly coarser texture to the crumb, making our Crusty Italian Bread feel even more authentic. It's not just for pasta, folks! A little bit goes a long way in giving our bread that special something. Trust me on this one, it’s a game-changer for Italian bread.
- 1 1/2 cups warm water (105-115°F): Water temperature is key, hon! Too hot, and you'll kill the yeast, too cold, and it won't activate properly. Think of it as a warm bath for your yeast just right for them to wake up and get to work making our dough light and airy. I always use a thermometer for this, because eyeballing it has led to some flat loaves in my past, to be real.
- 2 1/4 teaspoons active dry yeast: Our little leavening superstars! Yeast is what gives our Crusty Italian Bread its beautiful rise and airy texture. Without these tiny organisms, we'd just have a very dense, sad cracker. Make sure your yeast is fresh, an old packet can ruin your efforts before you even start. A quick check for bubbles after activating tells you they're alive and kicking!
- 2 teaspoons fine sea salt: Salt isn't just for flavor, though it definitely makes our bread taste incredible! It also plays a vital role in controlling the yeast's activity and strengthening the gluten structure. Too little, and your bread can taste bland, too much, and it'll slow the rise. It’s all about balance, and this amount is perfect for a truly delicious Crusty Italian Bread.
- 2 tablespoons extra virgin olive oil: A splash of good quality extra virgin olive oil adds a lovely richness and tenderness to the crumb of our bread. It also contributes to that beautiful golden crust and a subtle, fragrant aroma. It's a little secret ingredient that makes this Crusty Italian Bread taste just that much more luxurious, giving it a soft interior that contrasts so well with the crisp exterior.
How to Bake Your Own Crusty Italian Bread, Step by Step
- Step 1: Activate Yeast:
- Alright, first things first! Grab that warm water remember, 105-115°F is the sweet spot and sprinkle in your sugar and yeast. Give it a gentle stir, then just let it hang out for about 5-10 minutes. You're looking for a foamy, bubbly top, like a tiny beer head. That's how you know your yeast is alive and ready to make some magic for our beautiful Crusty Italian Bread. If it doesn't foam, your yeast might be dead, and it's best to start over, hon!
- Step 2: Mix Dough:
- Now for the main event! In a big mixing bowl, combine your bread flour, semolina flour, and salt. Pour in your activated yeast mixture, olive oil, and white vinegar. Stir it all together with a sturdy spoon or your hands until it forms a shaggy, somewhat sticky dough. Don't worry if it looks a bit messy, that's totally normal for this kind of dough. We're just getting everything acquainted before the real work begins on our Crusty Italian Bread.
- Step 3: Knead & First Rise:
- Time to get hands-on! Turn that shaggy dough out onto a lightly floured surface. Knead it for about 8-10 minutes. You'll feel it transform from sticky to smooth and elastic. It's a bit of a workout, but so rewarding! Once kneaded, place it in a lightly oiled bowl, cover it, and let it rise in a warm spot for 1-1.5 hours, or until it's doubled in size. This first rise is crucial for developing the flavor and texture of our Crusty Italian Bread.
- Step 4: Shape Loaf:
- Gently punch down your risen dough it's so satisfying! Turn it out onto a lightly floured surface again. Now, to shape our loaf. You want to gently fold the edges towards the center, creating a taut, round ball or an oblong shape. The goal is to create surface tension, which helps with a good oven spring. This step is key for that classic artisanal look of our Crusty Italian Bread.
- Step 5: Second Rise & Preheat:
- Dust a banneton or a bowl lined with a floured kitchen towel with cornmeal, then carefully place your shaped dough seam-side up. Cover it and let it rise for another 45-60 minutes. Meanwhile, this is crucial: preheat your oven to a scorching 475°F (245°C) with your Dutch oven or baking stone inside. Getting that oven super hot is the secret to a truly amazing crust on our Crusty Italian Bread.
- Step 6: Bake & Cool:
- Carefully transfer your risen dough to the screaming hot Dutch oven or baking surface. Score the top with a sharp knife get creative! Bake with the lid on (or with a pan of water for steam) for 20 minutes, then remove the lid/water and continue baking for another 20-25 minutes, or until it's deeply golden brown and sounds hollow when tapped. That glorious aroma means your Crusty Italian Bread is almost ready! Resist the urge to cut into it right away, cooling completely on a wire rack is essential for the best texture.
Baking this Crusty Italian Bread is such a joyful process for me. There's something so therapeutic about kneading the dough, feeling it transform under my hands. And the smell that fills the kitchen as it bakes? Pure heaven! It's messy, it's hands-on, and sometimes it doesn't go exactly to plan, but every time I pull that golden, crusty loaf from the oven, I feel like a culinary wizard. It's truly a labor of love.
Keeping Your Crusty Italian Bread Fresh: Storage Secrets
So, you've got this gorgeous loaf of Crusty Italian Bread, and you want to keep it fresh, right? Your best bet for keeping that amazing crust intact is to store it at room temperature, cut-side down on a cutting board, covered loosely with a clean kitchen towel. Don't put it in a plastic bag unless you want a soft, chewy crust (which isn't ideal for this bread!). It'll stay fantastic for 1-2 days this way. If you have leftovers beyond that, slice it up and freeze it in an airtight bag. I've made the mistake of bagging a warm loaf before, and let me tell you, it was a soggy disaster. Learn from my oops moment!

Swapping Ingredients for Your Perfect Crusty Italian Bread
I've experimented with a few things while making this Crusty Italian Bread. If you don't have durum semolina flour, you can totally use all bread flour, but you'll lose a bit of that characteristic golden color and slight chew. It'll still be delicious, just a little different. For the sugar, honey or maple syrup could work in a pinch for feeding the yeast, but stick to the granulated sugar if you can for consistency. I've also tried swapping a tiny bit of whole wheat flour for some of the bread flour for a nuttier flavor, but keep it to a small amount (maybe 1/4 cup) so you don't compromise that lovely light crumb too much. Just don't mess with the yeast or water temperature, those are non-negotiables!
Serving Up Your Homemade Crusty Italian Bread with Style
Oh, the possibilities with this Crusty Italian Bread are endless! My absolute favorite way to enjoy it is simply with a generous drizzle of good quality extra virgin olive oil and a sprinkle of flaky sea salt maybe some fresh cracked black pepper too. It's also incredible alongside a hearty minestrone soup or a rich pasta dish. Think bruschetta, garlic bread, or even just tearing off chunks to sop up leftover sauce. Honestly, it elevates any meal. And for breakfast? Toasted with a fried egg and avocado? Pure bliss. You'll find yourself reaching for this bread for everything, trust me.
The Heart and Soul of Crusty Italian Bread
This Crusty Italian Bread, while a home baking adaptation, draws its heart from the rich tradition of Italian panificazione bread making. In Italy, bread isn't just a side dish, it's a staple, a symbol of hospitality, and a testament to simple, quality ingredients. From the rustic Pane di Altamura of Puglia to the simpler country loaves, the emphasis is always on a robust crust, a tender crumb, and pure, unadulterated flavor. My first trip to Italy, smelling fresh bread wafting from every corner, truly inspired me to try and bring that magic home. This recipe is my little piece of that beautiful culinary heritage.
And there you have it, my friend! My go-to recipe for the most incredible Crusty Italian Bread right in your own kitchen. There's nothing quite like the pride of pulling a perfect loaf from the oven, knowing you made it yourself. It's more than just bread, it's a warm hug, a comforting aroma, and a delicious experience. I really hope you give this a try. When you do, please come back and tell me all about your baking adventures in the comments below! Happy baking!

Your Burning Questions About Crusty Italian Bread Answered
- → Can I use all-purpose flour instead of bread flour for this Crusty Italian Bread?
You can, but I really don't recommend it if you want that classic chewy texture. All-purpose flour has less protein, so your bread might be softer and less structured. If it's all you have, go for it, but expect a slightly different result for your Crusty Italian Bread. Bread flour truly makes a difference here!
- → My dough isn't rising. What went wrong?
Oh no! Usually, this means your yeast wasn't active. Check your water temperature too hot kills it, too cold it won't wake up. Also, make sure your yeast isn't expired. If it doesn't get foamy in Step 1, it's best to grab fresh yeast and start over. Don't give up on your Crusty Italian Bread!
- → How do I get a really crispy crust like yours on my Crusty Italian Bread?
The secret weapon is steam, friend! Baking in a preheated Dutch oven with the lid on for the first part of baking creates that steamy environment. If you don't have a Dutch oven, a pan of hot water on the bottom rack of your oven can help. Also, make sure your oven is super hot when the bread goes in!
- → Can I make this Crusty Italian Bread ahead of time?
Absolutely! You can do the first rise, then gently punch down the dough, shape it, and place it in a floured banneton (or bowl) in the fridge overnight for a slow, cold proof. Just let it come to room temp for 30-60 minutes before baking the next day. It can even enhance the flavor of your Crusty Italian Bread!
- → What if I don't have a banneton for the second rise?
No worries at all! Just line a regular bowl with a clean kitchen towel, dust it generously with flour (or cornmeal), and place your shaped dough seam-side up in there. It works perfectly to support the dough during the second rise and keeps it from spreading too much before baking your Crusty Italian Bread.