


I remember the first time I tried a fig bar, sitting on my grandma's porch, sun warm on my face. It was one of those store-bought ones, wrapped in plastic, but even then, the sweet, jammy fig filling and the soft, cakey crust felt like pure magic. Fast forward a few years (okay, maybe more than a few!), and I found myself staring at a pile of fresh figs from the farmers market, a little lost. Could I recreate that childhood memory? Honestly, I was skeptical. My kitchen looked like a flour bomb went off, but the scent of simmering figs? That's what kept me going. These homemade fig bars are a labor of love, a little messy, but oh so worth it.
My first attempt at these homemade fig bars? Let's just say I learned that parchment paper is not optional. The dough stuck, the filling oozed, and I ended up with something resembling a fig-flavored abstract art piece. My cat, bless her heart, gave it a sniff and walked away. But hey, that's how we learn, right? I picked myself up, dusted off the flour, and tried again. And again. Eventually, I nailed it, and now I can share all my "oops" moments so you don't make them!
Ingredients for Homemade Fig Bars
- Fresh Figs: These are the star of our homemade fig bars! I usually grab Black Mission figs, they're so sweet and jammy. Don't even think about dried ones for the filling, it just won't be the same, trust me.
- All-Purpose Flour: The backbone of our tender crust. I tried using whole wheat once for a "healthier" twist, and honestly, the texture was a bit too dense. Stick with the AP flour for that classic, soft crumble.
- Unsalted Butter: This gives our crust that rich, melt-in-your-mouth texture. Make sure it's cold, really cold, like you just pulled it from the fridge. I once used room temp butter and the dough was a greasy mess, a total kitchen disaster.
- Granulated Sugar: Just enough to sweeten the figs and the crust without making it cloying. I sometimes cut back a tiny bit if my figs are super ripe, but generally, this amount just hits right.
- Lemon Juice: A little squeeze brightens up the fig filling and keeps it from being too heavy. I always use fresh, never bottled. You can really taste the difference, a subtle zing!
- Vanilla Extract: Pure vanilla, please! It adds a warmth to the filling that's just essential. I swear by Nielsen-Massey, you can smell the quality the moment you open the bottle.
- Baking Powder: Just a touch in the crust to give it a slight lift and tenderness. Don't skip it, it makes a difference!
- Salt: A pinch in both the crust and the filling. It balances the sweetness and brings out all the other flavors. I always use fine sea salt.
Steps to Make Your Own Homemade Fig Bars
- Prepare the Fig Filling:
- First things first, let's get those figs ready. Wash and trim the stems from your fresh figs, then chop them roughly. Toss them into a saucepan with a splash of water, a squeeze of lemon juice, and a little sugar. I love watching them soften and break down, the kitchen starts smelling incredible, like a sweet, earthy perfume. Simmer them gently, stirring occasionally, until they’re thick and jammy. This usually takes me about 15-20 minutes. Don't walk away, though, or you might end up with a burnt bottom like I did one time a real oops moment!
- Make the Crust Dough:
- While your figs are doing their thing, grab a large bowl for the crust. Whisk together your flour, baking powder, and salt. Now, cut in that cold, unsalted butter. I use my fingers, squishing it until it looks like coarse crumbs, almost like wet sand. This step is key for a tender crust, so don't overmix! Add a little granulated sugar and a touch of vanilla, then bring it all together with just enough cold water to form a shaggy dough. I've learned the hard way that too much water makes a tough crust, so add it slowly, a tablespoon at a time.
- Assemble the Homemade Fig Bars:
- Divide your dough in half. Roll out one half on a lightly floured surface into a rectangle that fits your prepared baking pan. Press it gently into the bottom of the pan. Now, spoon your cooled fig filling evenly over this crust. Oh, the smell of that fig filling! It's so rich and inviting. For the top, you can either roll out the second half of the dough and cut it into strips for a lattice, or just crumble it over the top. I often go for the crumble because, honestly, sometimes I'm just too impatient for a lattice, and it still tastes amazing!
- Bake Your Homemade Fig Bars:
- Pop your pan into a preheated oven, usually around 375°F (190°C). I always set a timer for about 25-30 minutes, but I start peeking around 20. You're looking for that beautiful golden-brown color on the crust and a bubbly, set filling. The aroma that fills your kitchen at this point is just heavenly, a mix of warm butter and sweet figs. If it looks like it's browning too fast, a loose foil tent can save the day learned that after a few too many "crispy" edges.
- Cool and Slice:
- This is the hardest part, I swear! Once your fig bars are out of the oven, let them cool completely in the pan on a wire rack. I know, I know, you want to dive right in! But trust me, letting them cool helps the filling set properly and makes slicing so much easier and cleaner. I've definitely tried to cut them warm before, and let's just say it was a delicious, albeit messy, experience. Patience is a virtue here, friends!
- Enjoy Your Homemade Fig Bars:
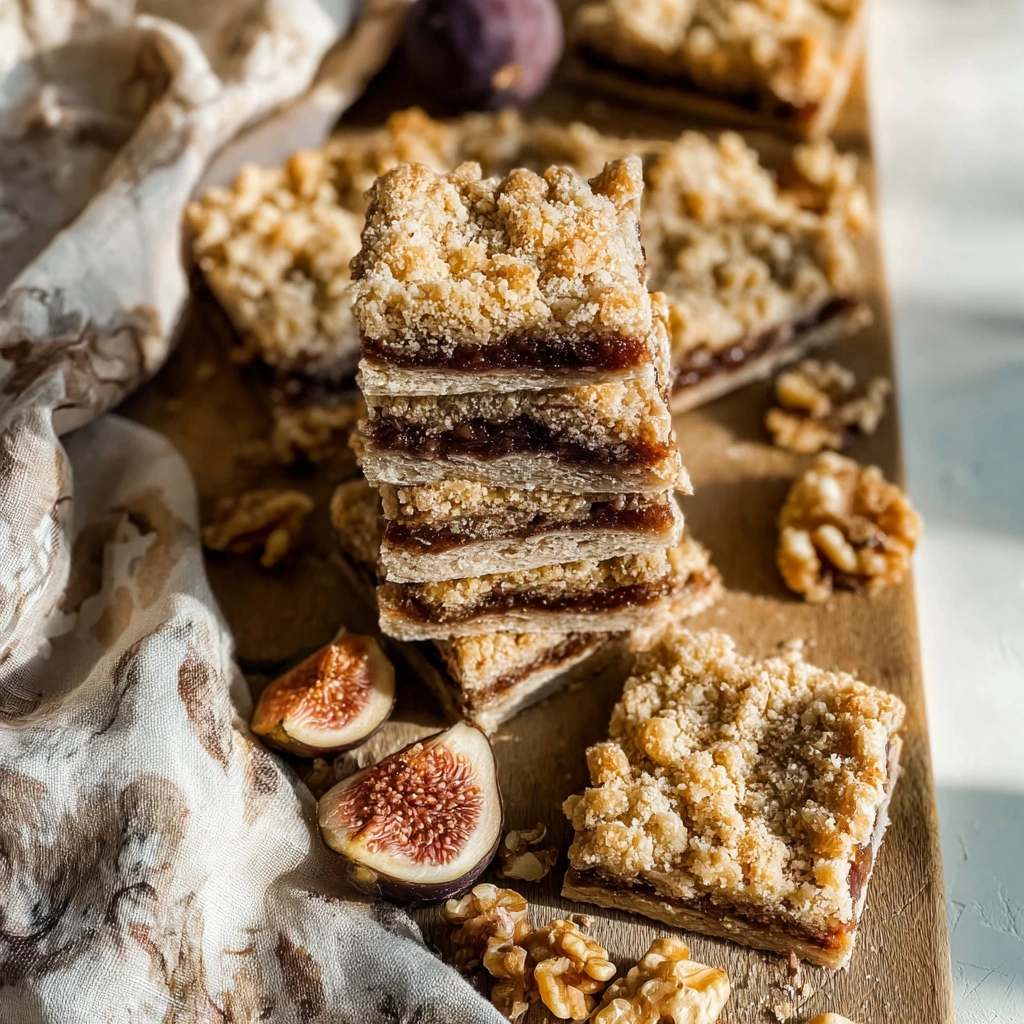
- Once fully cooled, lift the homemade fig bars out of the pan using the parchment paper and slice them into individual bars. They should hold their shape beautifully now, with that tender crust and sweet, chewy fig center. The texture is just perfect a little crumbly, a little jammy. These are so good with a cup of tea or coffee, or just by themselves as a sweet little pick-me-up. I love seeing that swirl of deep purple fig against the golden crust. Pure bliss!
There's something so satisfying about pulling a tray of these fig bars from the oven. Even if there's a little flour on my nose and a smudge of fig jam on the counter, it feels like an accomplishment. It's not just a recipe, it's a little piece of home, a sweet reminder of simple pleasures. My kids now ask for "Mom's fig treats," and honestly, that's the best reward.
Storage Tips for Homemade Fig Bars
So, you've made a batch of these glorious homemade fig bars and (miraculously) have some left over? Great! I usually store mine in an airtight container at room temperature for up to 3-4 days. I tried putting them in the fridge once, thinking they'd last longer, but the crust got a bit firm, and the filling lost some of its lovely chewiness so don't do that, lol. If you want to keep them longer, they freeze beautifully! Just wrap individual bars tightly in plastic wrap, then pop them into a freezer bag. They'll keep for up to 3 months. To thaw, just let them sit at room temperature for an hour or so. Sometimes I zap one in the microwave for a few seconds, and it brings out that fresh-baked warmth again, but watch it closely so it doesn't get too soft!
 Pin it
Ingredient Substitutions for Your Homemade Fig Bars
I'm all about using what you've got! For the figs, while fresh are best for these homemade fig bars, if they're out of season, you can use dried figs. Just rehydrate them in a little warm water or orange juice for about 30 minutes before simmering. The texture won't be quite as juicy, but it still works, kinda. For the crust, I've swapped out half the all-purpose flour for oat flour before, and it gave a nice nutty flavor, though the bars were a bit more crumbly. If you're out of lemon, a tiny splash of orange juice can work in the filling, it adds a different kind of brightness. And if you're dairy-free, a good plant-based butter (like Miyoko's Kitchen) can be a decent swap for the unsalted butter in the crust, though I haven't perfected that one yet!
Serving Suggestions for These Homemade Fig Bars
These homemade fig bars are pretty versatile. My absolute favorite way to enjoy them is with a steaming cup of Earl Grey tea in the afternoon pure bliss! For a little something extra, a small dollop of mascarpone cheese or a scoop of vanilla bean ice cream on the side is just divine, especially if the bars are still slightly warm. Honestly, they're also fantastic packed in a lunchbox for a sweet treat, or as a simple dessert after a light dinner. I've even served them alongside a cheese board with some sharp cheddar and a drizzle of honey, the sweet and savory combo is surprisingly good. They just make any moment feel a little more special, like a mini celebration.
The Sweet Backstory of Homemade Fig Bars
Fig bars, in their various forms, have been around for ages! The concept of a fruit-filled pastry is ancient, but the modern fig bar we know and love has its roots in late 19th-century America. The original Fig Newton was created as a "health food" to aid digestion, believe it or not! For me, these homemade fig bars connect to a simpler time, when snacks felt more wholesome and made with love. My grandma always had something baked on her counter, and while she probably never made fig bars from scratch, the spirit of her baking using fresh ingredients, making something comforting is what I feel when I'm stirring that fig filling. It's a taste of history, a personal connection to kitchen traditions, and a nod to a fruit that's been cherished for millennia.
Making these homemade fig bars has become a little ritual in my kitchen, a sweet escape from the everyday. They might not be perfect every time sometimes the edges are a little too dark, or the filling peeks out a bit but that's the beauty of homemade, isn't it? Each one tells a story, a little edible memory. I really hope you give them a try and make your own kitchen memories. Let me know how your batch turns out!
 Pin it
Frequently Asked Questions
- → Can I use dried figs for these homemade fig bars?
You can, but I honestly prefer fresh for that rich, jammy texture. If you use dried, make sure to rehydrate them first in warm water for about 30 minutes, or they'll be too tough. I tried just chopping them once, and it was a mistake!
- → What if I don't have fresh lemon juice?
A tiny splash of orange juice can work as a substitute to brighten the fig filling. It gives a slightly different citrus note, but it still helps balance the sweetness. I've used it in a pinch, and it was pretty good, kinda worked!
- → Why is my crust tough?
Most likely, you either overmixed the dough or used too much water. Remember, cold butter and minimal handling are key for a tender, flaky crust. I've definitely been guilty of overworking the dough when I was first starting out, leading to some very dense bars!
- → How long do homemade fig bars last?
They're best within 3-4 days stored in an airtight container at room temperature. I've tried refrigerating them, but the crust gets a bit hard. Freezing is your friend for longer storage, they keep well for up to 3 months when wrapped properly.
- → Can I add spices to the fig filling?
Absolutely! I often add a pinch of cinnamon or a tiny dash of cardamom to my fig filling. It really deepens the flavor and adds a warm, inviting aroma. I even tried a tiny bit of star anise once, and it was surprisingly delicious!