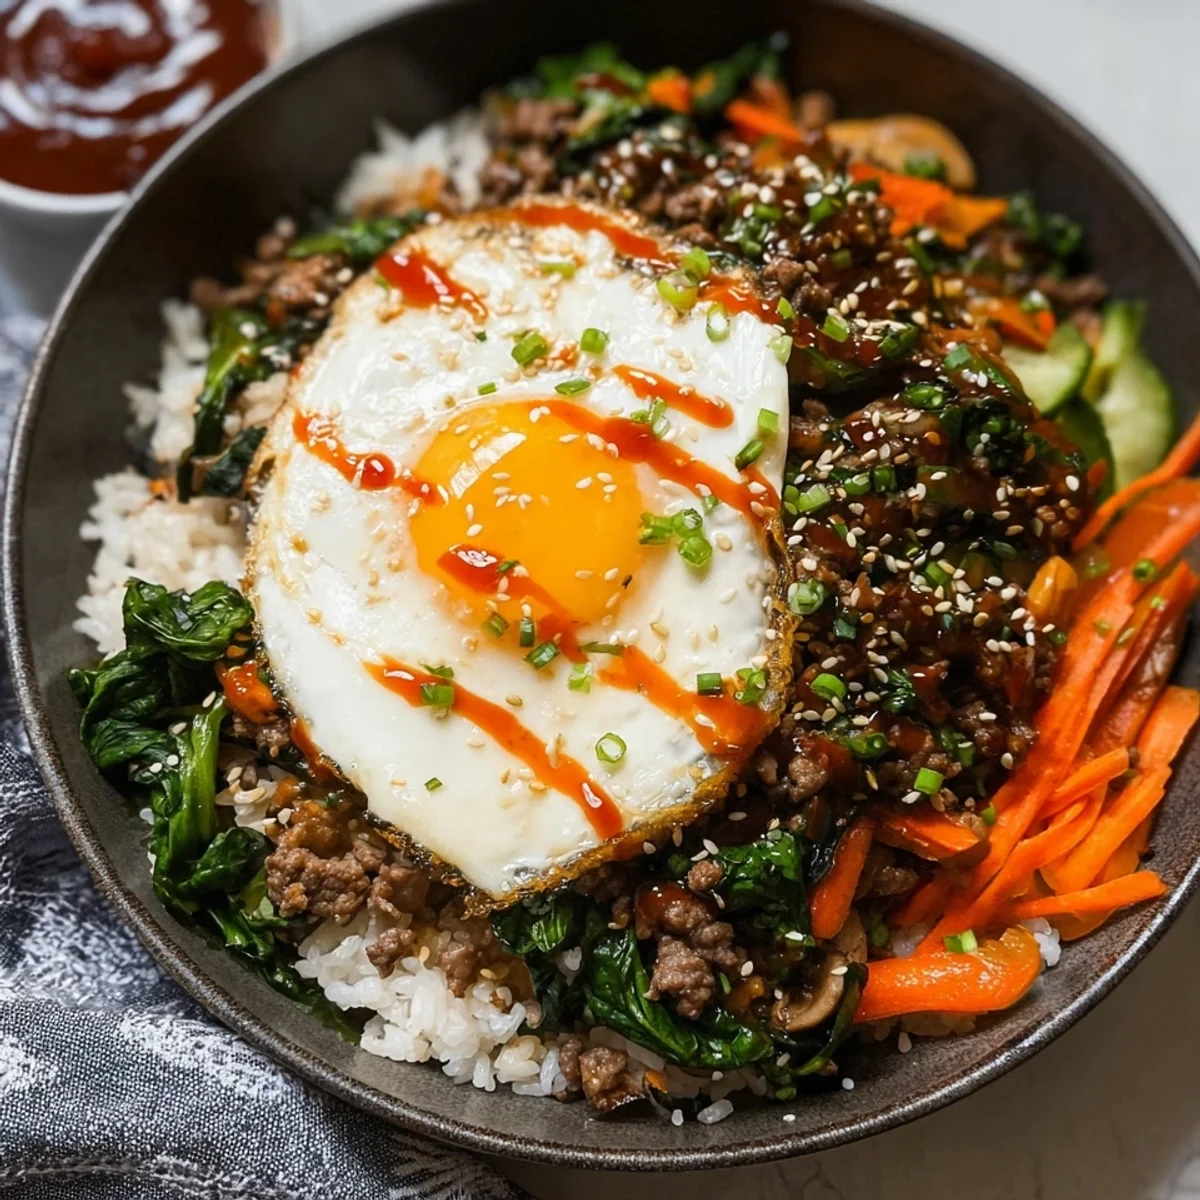
You know how some recipes just click? Like, you try it once, and it feels like it's been in your repertoire forever? That's how I felt about this Shortcut Skillet Bibimbap. I first stumbled upon a version of it after a particularly hectic Tuesday, staring into an empty fridge, thinking, 'There has to be a faster way to get those amazing Korean flavors.' And boom! This one-pan wonder came to life. It's been a weeknight savior ever since, bringing all that vibrant, comforting goodness right to my table without the fuss. Seriously, you're going to love it.
Oh gosh, the first time I made this Skillet Bibimbap, I was so excited about the crispy rice, I cranked the heat way too high. The bottom half of my rice was... well, let's just say it was crunchy. Like, charcoal crunchy. My husband, bless his heart, tried to scrape it off, but we ended up with a hilarious, slightly smoky mess. Lesson learned: low and slow for that perfect golden crust!
Ingredients for Your Easy Skillet Bibimbap
- 1 lb lean ground beef (90/10): This is our protein powerhouse! I always go for lean ground beef because it cooks up quickly without leaving a ton of grease, which means less draining and a cleaner Skillet Bibimbap. It browns beautifully, absorbing all those yummy marinade flavors we're about to throw at it. Plus, it's so easy to break up in the pan, making sure every bite gets some savory goodness.
- 1 tbsp soy sauce, 1 tsp sesame oil, 1 tsp grated fresh ginger (for beef): This trio is like the secret handshake for amazing beef. The soy sauce brings the savory depth, sesame oil adds that unmistakable nutty aroma, and fresh ginger? Oh, it just brightens everything up! Don't skip the fresh ginger, hon, it makes all the difference in lifting the flavor of the beef, giving it that authentic Korean kick. Trust me, your taste buds will thank you.
- 1 cup shredded carrots: Carrots are my go-to for a pop of color and natural sweetness. Shredded makes them cook super fast and blend right into the dish, adding a lovely texture without being overwhelming. They're also a sneaky way to get extra veggies in, which is always a win in my book. Plus, that bright orange against the green spinach? So pretty!
- 5 oz fresh spinach: Spinach is a total superstar here. It wilts down to practically nothing, so that huge pile you start with shrinks into a perfectly manageable, nutrient-packed addition. I love how it adds a fresh, earthy balance to the richness of the beef and sauce. It's one of those ingredients that feels good to eat, you know?
- 1 cup sliced cremini mushrooms: Mushrooms are fantastic for adding an umami punch and a meaty texture, especially if you're trying to stretch the beef a bit. Creminis are my favorite because they have a deeper flavor than white button mushrooms, but honestly, any mushroom will work. They soak up all the pan juices like little sponges, becoming incredibly flavorful. A must-add for depth!
- 1 small zucchini, diced (about 1 cup): Zucchini is another one of those versatile veggies that just works so well in a Skillet Bibimbap. Diced small, it cooks quickly and adds a subtle freshness without overpowering the other flavors. It's a great way to use up garden zucchini, and it adds another layer of texture and nutrition to our vibrant pan. It's totally optional, but I love the addition!
Making Skillet Bibimbap: Your Step-by-Step Guide
- Step 1: Mix Bibimbap Sauce:
- This is where the magic starts for your Skillet Bibimbap! In a small bowl, whisk together the gochujang, soy sauce, and a tiny splash of water if it’s too thick. Gochujang is spicy, sweet, and savory all at once it’s the heart of this dish. Taste it! Adjust to your liking. I always sneak a little spoonful. It should be vibrant and ready to coat everything in deliciousness. This sauce is what ties all the flavors together, making our Skillet Bibimbap sing.
- Step 2: brown Ground Beef:
- Get your skillet nice and hot over medium-high heat. Toss in that lean ground beef, breaking it up with a spoon. You want it beautifully browned and crumbly, not steamed. Once it's almost cooked through, drain any excess fat we want flavor, not grease! Then, stir in the soy sauce, sesame oil, and grated ginger. Let it sizzle for another minute, soaking up all those aromatics. This savory base is crucial for our amazing Skillet Bibimbap.
- Step 3: Cook Vibrant Veggies:
- After the beef is out, but while the skillet's still hot, add a tiny bit more oil if needed. First, the mushrooms let them get a good sear and release their moisture. Then, toss in the shredded carrots and diced zucchini. Stir-fry them for just a few minutes until they're tender-crisp. Finally, add the spinach. It'll look like a mountain, but it'll wilt down super fast. You want bright, tender veggies, not soggy ones, for the best experience.
- Step 4: Fry Sunny-Side Eggs:
- Okay, now for the crowning glory! In a separate small non-stick pan, fry up your eggs sunny-side up. You want those beautiful, runny yolks that will become part of the sauce when you break into them. A little crispy edge on the whites is fantastic. Don't overcook them! This step is optional, but honestly, a runny egg takes this Shortcut Skillet Bibimbap from great to absolutely legendary. It's non-negotiable for me!
- Step 5: Build Skillet Base:
- Now for the assembly! If you want that amazing crispy rice bottom, spread your cooked rice evenly in the skillet. Press it down gently. Drizzle a tiny bit of sesame oil around the edges. Let it cook undisturbed over medium-low heat for 8-10 minutes. You'll hear it crackling! This is the secret to a fantastic dish. While it crisps, arrange your cooked beef and sautéed veggies beautifully over the rice.
- Step 6: Heat and Garnish:
- Once your rice is crispy (or if you skipped that step, just warm everything through), remove the skillet from the heat. Carefully slide those sunny-side up eggs right on top of your masterpiece. Drizzle generously with that incredible bibimbap sauce you mixed up earlier. Garnish with a sprinkle of sesame seeds and maybe some sliced green onions if you're feeling fancy. Serve it right out of the skillet for the ultimate communal Skillet Bibimbap experience!
Cooking this Skillet Bibimbap is such a joy. It's a symphony of sizzling, vibrant colors coming to life, and the aroma filling my kitchen is just incredible. There's something so satisfying about seeing all those fresh ingredients transform into such a comforting, flavorful meal. Every time, I just know it’s going to be a good dinner.
How to Store Leftover Skillet Bibimbap
Got leftovers of your amazing dish? Lucky you! Store them in an airtight container in the fridge for up to 3-4 days. I've definitely made the mistake of just covering the skillet with foil and sticking it in, only to find the rice dried out oops! For reheating, my favorite way is to pop it back into a non-stick skillet over medium heat, maybe with a tiny splash of water, and let the rice crisp up again. The microwave works too, but you lose that glorious crispy bottom. It reheats surprisingly well, making it perfect for next-day lunches!

Swapping Ingredients for Skillet Bibimbap
This recipe is so forgiving, hon! If ground beef isn't your jam, try ground chicken, turkey, or even crumbled firm tofu for a vegetarian version. I've swapped cremini mushrooms for shiitake or oyster mushrooms, and they were fantastic. No carrots? Bell peppers or edamame work great. Spinach can easily be subbed with kale (just sauté it a bit longer) or even bok choy. And if gochujang is too spicy, start with less and add more soy sauce, or mix in a touch of honey to balance it out. Experiment! It’s hard to mess up this dish.
What to Serve with Your Skillet Bibimbap
Honestly, this dish is a complete meal all on its own, especially with that runny egg on top! But if you want to elevate the experience, a side of kimchi is non-negotiable for me its fermented tang and crunch cut through the richness beautifully. Sometimes I’ll serve it with a simple seaweed salad or a quick cucumber pickle for extra freshness. If you're hosting, a little bowl of extra gochujang sauce on the side lets everyone adjust the spice to their liking. And for a truly authentic touch, don't forget the roasted seaweed snacks to crunch alongside! So good.
The Story Behind Skillet Bibimbap
Bibimbap, meaning 'mixed rice,' is one of Korea's most iconic and beloved dishes, and our Skillet Bibimbap is a nod to its comforting roots. Traditionally, it's a bowl of warm rice topped with sautéed vegetables (namul), gochujang, beef or other proteins, and often a raw or fried egg. The beauty of it lies in mixing everything together before eating! It’s a dish with a long history, often made to use up leftover banchan (side dishes) after holidays. My shortcut version captures that soul-warming essence and incredible flavor, making it accessible for any weeknight. It's food that tells a story, you know?
There you have it, my friends! A dish that's become a true staple in my home. This Skillet Bibimbap is more than just a meal, it's a vibrant, comforting hug in a bowl, or rather, a skillet! I hope it brings as much joy to your kitchen as it does to mine. Give it a whirl, play with the ingredients, and tell me all about your creations in the comments below. Happy cooking!

Common Questions About Skillet Bibimbap
- → Can I make this Skillet Bibimbap vegetarian?
Absolutely! Just swap the ground beef for crumbled firm tofu or your favorite plant-based ground. Sauté it with the same soy sauce, sesame oil, and ginger mix for a fantastic flavor. The rest of the veggies and sauce are already veggie-friendly. So versatile!
- → What if I don't have gochujang?
Gochujang is pretty unique, but if you're in a pinch, you can try a mix of sriracha, miso paste, a touch of sugar, and a little soy sauce for a similar spicy-savory-sweet profile. It won't be exactly the same, but it'll get you close enough to still enjoy your meal. Worth getting some for next time though!
- → Can I use pre-cooked rice?
Yes, and it actually works brilliantly for the crispy rice bottom! Just make sure it's cold, day-old rice if possible, as it gets crispier. If using freshly cooked rice, spread it out on a baking sheet for a bit to cool and dry slightly before adding it to the skillet. Super convenient!
- → How do I get the perfect crispy rice?
The key is medium-low heat and patience. Spread the rice evenly, press it down, drizzle with a little sesame oil, and then just leave it alone for 8-10 minutes. Don't stir! Listen for the gentle crackle. You can peek with a spatula after 8 minutes to check for that beautiful golden crust. It's so satisfying!
- → Can I add more vegetables?
Oh, for sure! That's the beauty of this dish. I've thrown in bell peppers, broccoli florets, or even blanched bean sprouts. Just make sure to cut them into similar sizes so they cook evenly and don't overcrowd your skillet. More veggies mean more color and nutrients, so go wild!